⚡️ Quickstart: Backup all your files offsite with Backblaze

To successfully complete this Instruction you'll need
- A desktop, running either macOS (10.10 and above) or Windows 64-bit (7, 8, 8.1 and 10), and
- A modern and updated browser running on that desktop.
- A password manager, set up on your desktop, to create and store good passwords for the Backblaze account you'll be making. Use this quickstart if needed.

By the end of this Instruction, you'll have...
- Set up Backblaze Personal on a 15-day no-cost trial, ready to seamlessly switch to the monthly subscription plan.
- Be automatically backing up your files to remote storage, using the Backblaze app installed on your desktop computer.

Helpful words
When we use words in a way that is unfamiliar, come back here then click through to an explainer in the Glossary.
Let's get started!

A. Signup through the Backblaze registration page
You'll need an account with Backblaze to automatically backup and restore files using the Backblaze app.
- Open up your browser, then go to https://www.backblaze.com/cloud-backup.html.
- Click on the Try it free button, which will take you to https://www.backblaze.com/free-trial.html.

B. First, create an entry in your password manager for a new username-password combination
Use your password manager to create, then save, a new username-password entry. After this step, you'll use this entry to create a new Backblaze account.
- In your password manager, enter the email address you want to register with.
- Generate a good, random password. The password manager can do this for you. Make sure it's 32 characters long, uses symbols, numbers, and alphabets.
- Save the entry.

C. Then, use the new entry in the password manager to fill out the fields on the registration page
Copy then paste the email and password from the password manager into the registration page.

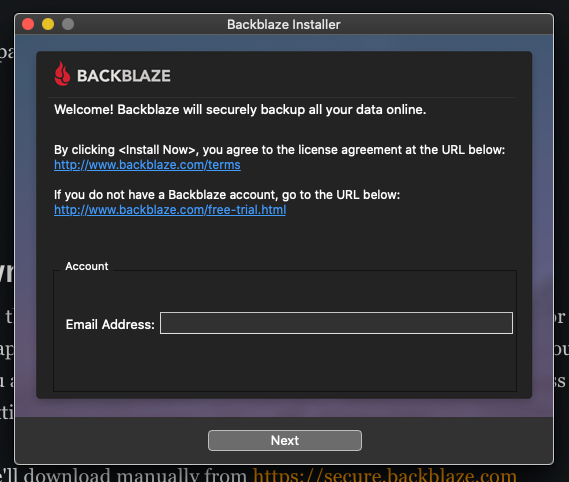
D. Download the installer
We'll need to download the installer, which will set up the Backblaze app on our desktop computer.
Submitting the registration form may trigger a download of an installer. Skip this download. This particular installer is created for your account, aiming to help you avoid needing to login. But, it also means you'll need to bypass security settings for your MacOS to take advantage of this convenience.
Instead, we'll download manually from https://secure.backblaze.com/download.htm. Be sure to choose the correct one for your operating system.

E. Start the installer
Windows: Double-tap the .exe and continue. Follow the prompts.
macOS: Double-tap the .dmg and continue. Follow the prompts.

F. Log in to your Backblaze account
You'll need to sign in using your username-password to let the Backblaze app know to backup your data using the account you created earlier.
Like you did earlier, copy then paste the email and password from the password manager into the installer.
G. Follow the displayed instructions to install the app and start backing up files
The instructions are specific to your operating system. The installer walks you through this step, so we won't confuse you by giving alternative guidance here :-)
Follow the prompts in the installer to install the app and start backing up files.
By default, Backblaze backs up all your data. Most people need a complete backup. You can change this behaviour.

H. First, create an entry in your password manager for a new private encryption key
Use your password manager to create, then save, a new private encryption key. After this step, you'll use this entry to enable encryption in Backblaze.
A private encryption key will ensure you, and only you (not Backblaze even), can access your files. You will be using Backblaze's end-to-end encryption (glossary).
- Generate a good, random password. The password manager can do this for you. Make sure it's 32 characters long, uses symbols, numbers, and alphabets.
- Save the entry. Make sure you can distinguish it from the earlier Backblaze username-password combination. We use a different name, such as "backblaze.com private encryption key".

I. Second, switch on encryption using your private encryption key
This is arguably the most important step. Everyone who has a Backblaze account should set a personal encryption key. Using a personal encryption key adds a layer of security that prevents anyone but you from accessing your files, no matter what.
Encryption is a great way to prevent unauthorized access to information, because encrypted content is useless without the key to decrypt it.
We're using key and password interchangeably, because this key is just another password. For example, in an earlier step you saved your private encryption key as a password in your password manager.
Do not forget or lose this key. In addition to keeping it in your password manager, feel free to write it down, then store it in a secure place, such as a safe. If you lose the private encryption key, you will not be able to decrypt the files backed-up on Backblaze. The company cannot help you recover the key.
- From the Backblaze window that displays after a successful install of the app:
Settings (button) -> Security (tab) - Tap
Enter Your Private Encryption Key (button)and paste the encryption key you created. - Tap
Set Private Keyto begin encryption.

J. Let the backup happen, in the background.
The first backup will take ages (think days), because it is backing up all the data on your desktop computer. Exactly how long depends on the speed of your internet connection, and the total size of all your files.
Subsequent backups, of the files you add or change, will be much faster.

Have remote backups?
When you have remote backups ready, go ahead and copy the following text to your MAP. Remove mention of the fictional Treehouse B&B business, and use your own wherever appropriate.
Copy content from this dropdown
Treehouse B&B is has implemented remote backups to recover from the most common incidents involving data loss. Our backups allow us to meet our commitments to you even if we experience IT issues.
Recommended next step
Take a quiz to test your recall!
 Manil
Manil
We recommend setting up local backups as well. Remote backups like the one you just created are for when your local backups get damaged or lost. Local backups are faster to access and are easier for day-to-day use, like if you made unwanted changes to a file and want to go back to yesterday's version.
Meta
Tools used
Manil